Data Transfer from Supercomputers
1. Install Rclone
With administrator privileges (e.g., Ubuntu):
$ sudo apt install rclone
Without administrator privileges on shared machines:
$ wget https://downloads.rclone.org/rclone-current-linux-amd64.zip
$ unzip rclone-current-linux-amd64.zip
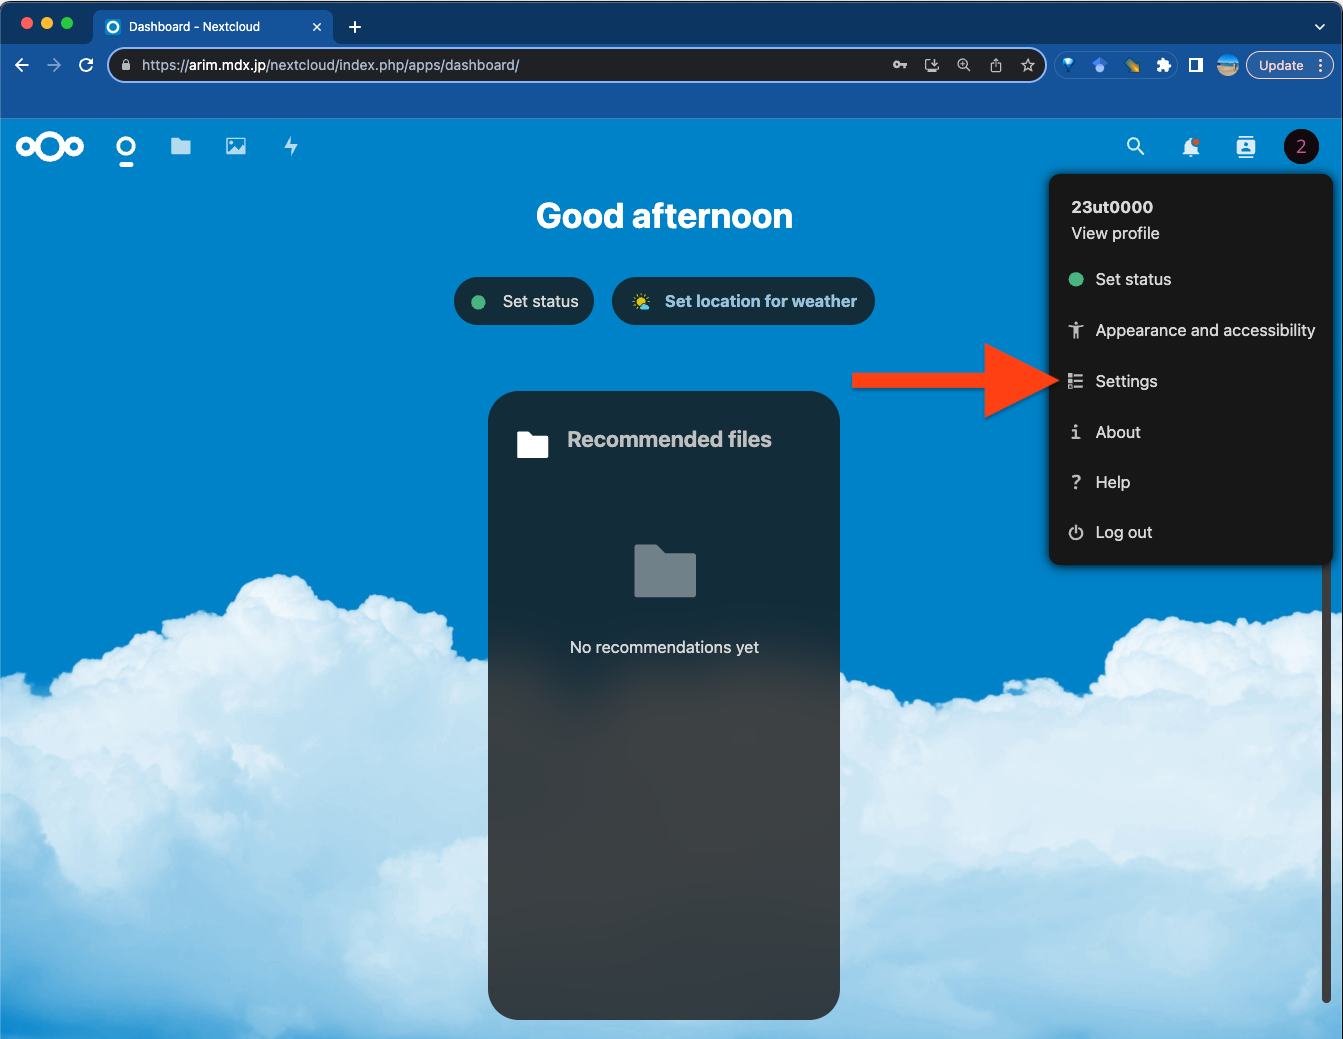
rclone from rclone-version-linux-amd64/ to your PATH.2. Issue Nextcloud Device Password
Note
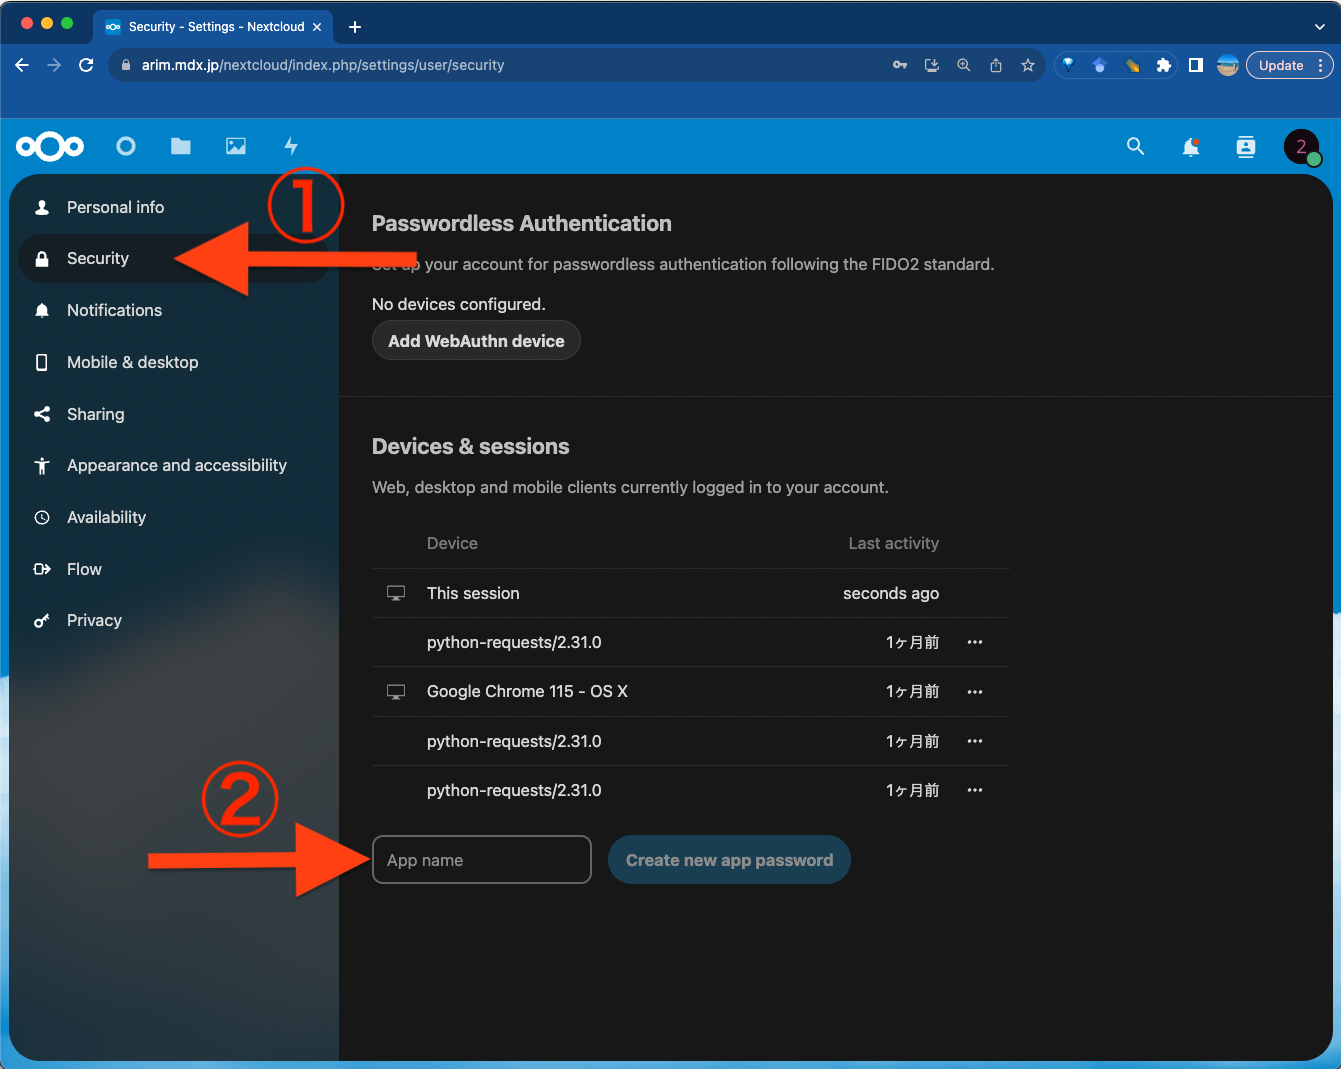
This process is required for each device (i.e., supercomputer or server) individually. It should not be reused.

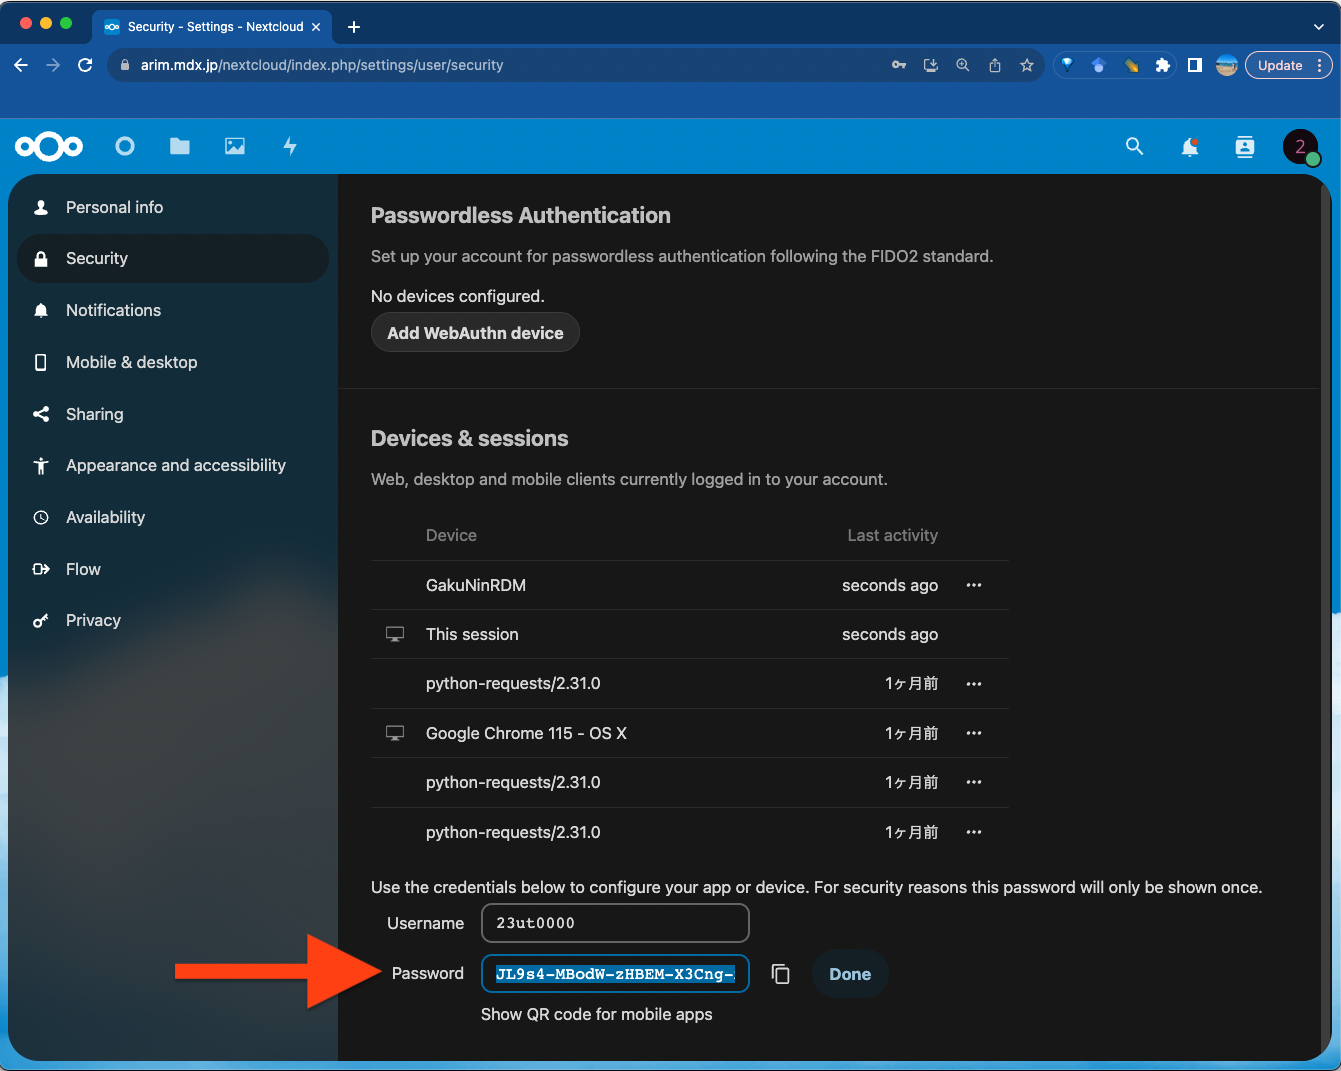
App name (any name, such as supercomputer’s name), then click “Create new app password” .

Note
Once you close or move away from this screen, you won’t be able to see the password again. Please keep this screen open until you complete the setup, or make note of the generated password. After completing the setup, please discard the password.
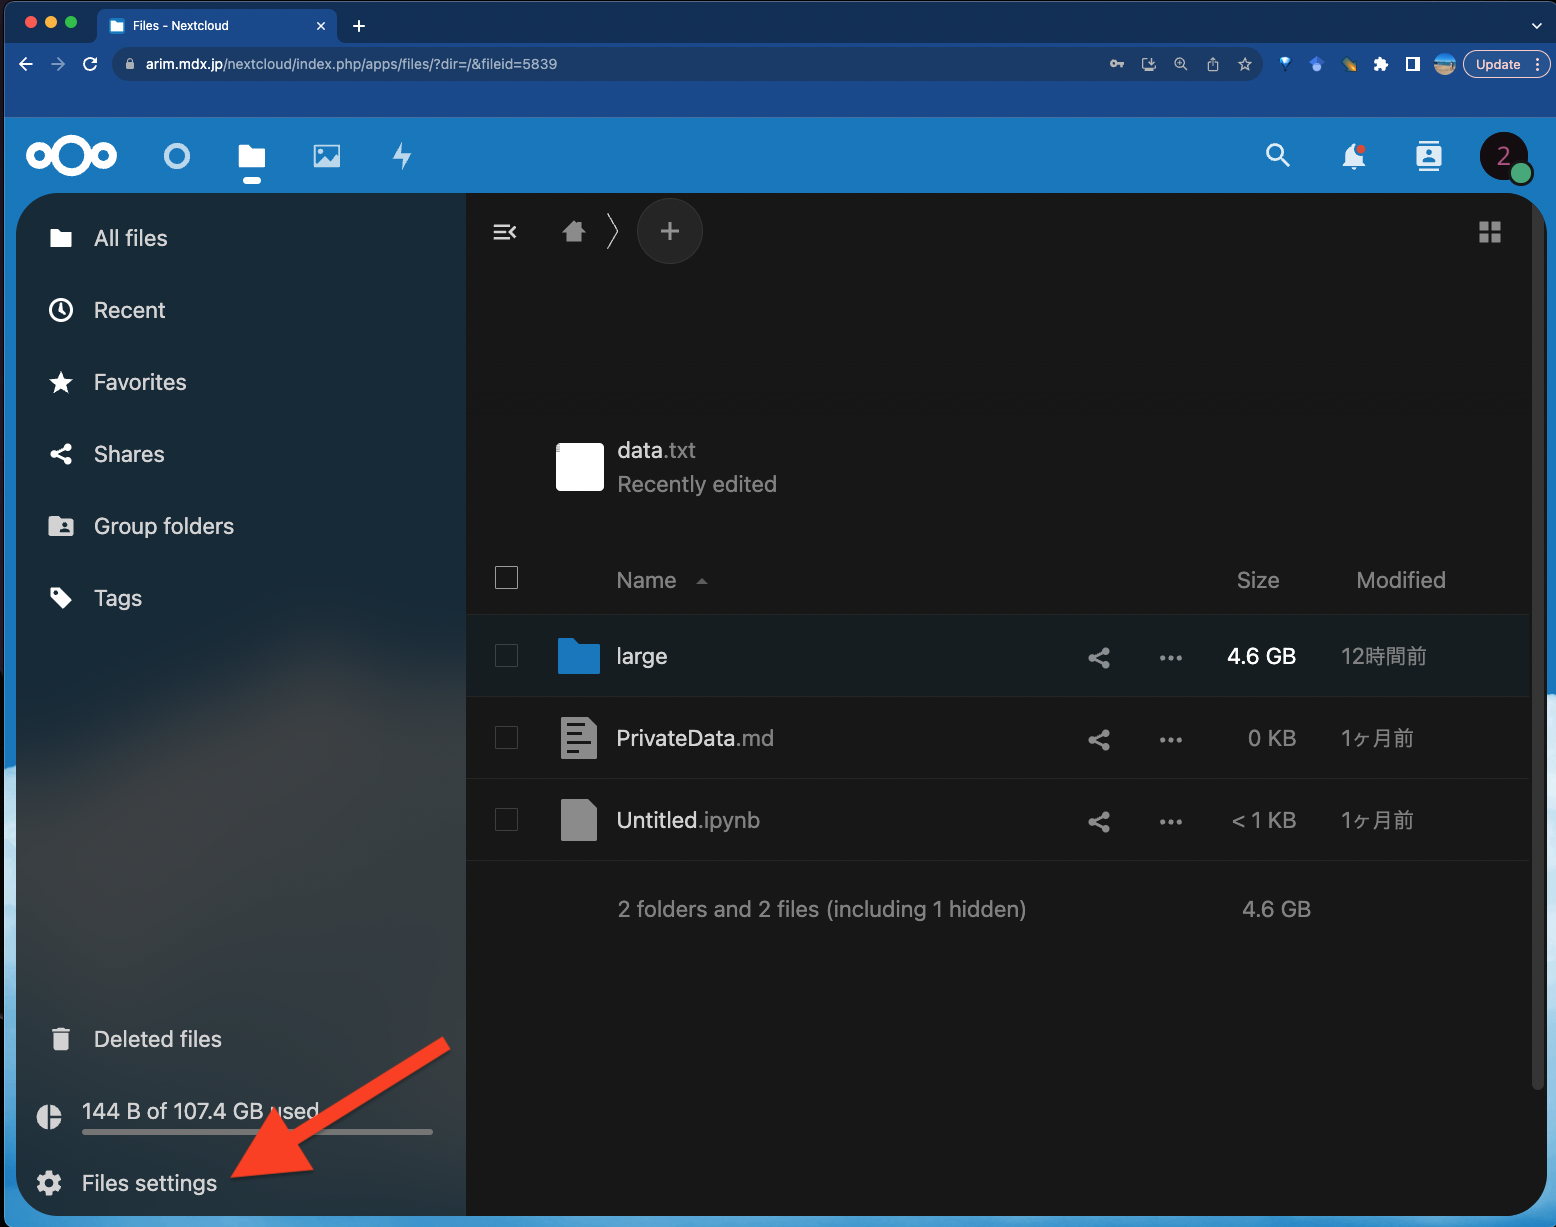
2. Getting Nextcloud WebDAV URL

https://arim.mdx.jp/nextcloud/remote.php/dav/files/{username}3. Configuring Rclone
Configure on the computing server using the generated User ID, Password, and WebDAV URL:
$ rclone config
Answer the following questions for configuration:
No remotes found, make a new one?→ Enter “n” (first letter of new) ↵Enter name for new remote.→ Enter any name for the connection. Example: Enter “arim” ↵Option Storage.→ Select connection method. Enter “webdav” ↵Option url.→ Enter the WebDAV URL obtained above ↵Option vendor.→ Enter “nextcloud” ↵Option user.→ Enter the generated User ID ↵Option pass.→ Confirm to enter password. Enter “y” ↵Enter the password:→ Enter the issued Password ↵ (password input is hidden)Confirm the password:→ Re-enter the same password for confirmation ↵Option bearer_token.→ Press ↵ without entering anythingEdit advanced config?→ Press ↵ without entering anythingConfiguration complete.→ Press ↵ without entering anythingCurrent remotes:→ Enter “q” to quit ↵
This creates a configuration file at ~/.config/rclone/rclone.conf.
4. Basic Usage of Rclone
Display directories:
$ rclone lsd arim:
Display deeper directories:
$ rclone lsd arim:large/xxx/yyy/zzz
Copy files (from local to ARIM-mdx Nextcloud):
$ rclone copy yyy/ arim:large/xxx/yyy/
Copy files (from ARIM-mdx Nextcloud to local):
$ rclone copy arim:large/xxx/yyy yyy/
Remote mount (verify with df after mounting):
$ mkdir arim
$ rclone mount --daemon arim:large/xxx/ arim/
Note
For systems with login node resource restrictions like ISSP’s kugui supercomputer, you need to limit GO language program (Rclone) parallelism using environment variables:
$ export GOMAXPROCS=1
5. Detailed Usage
You can refer to rclone and subcommand options with these commands:
$ rclone --help
$ rclone subcommand --help
To see detailed help for each subcommand, replace the subcommand part with actual commands (e.g., copy, lsd, mount, etc.).